How To Dynamically Redirect Your HubSpot Form Using Vanilla Javascript (Step-By-Step Guide)

HubSpot forms are great for newsletter signups, event registrations, gated content downloads, and plenty more. However, when it comes to using HubSpot forms for more advanced revenue operations, what you get out-of-the-box can sometimes leave you wanting more. A perfect example of this is if you want to dynamically redirect your form based on the information submitted within it, such as the state a lead is in for territory assignments, or the type of company a lead works at to connect them with the proper internal team member. By default, HubSpot provides no way to do this. Fortunately, with just a few lines of JavaScript, we can make some magic happen.
Here's what we'll cover:
- Dynamic Form Redirect Requirements
- How to Dynamically Redirect Your Form
- Example Use Cases
- The Last Sip
Let's get caffeinated!

Dynamic Redirect Requirements
While there aren't any strict form requirements for having your form dynamically redirect, there are a few things you should keep in mind, depending on your use case.
Using JavaScript
The code we'll be sharing below is relatively simple, however if you're not a developer and have never coded anything before, it may take some time for you to figure out exactly how to mold it to your unique situation. Fortunately, there are tons of free resources online, both video and written (W3 Schools is my personal go-to), that can help you get started, and it shouldn't take you long to get to a level where you feel comfortable. You'll also be dealing with HubSpot Global Form Events, which have their own syntax and learning curve.
Enumeration Fields vs. Text Fields
Since we'll be using the submission data itself to determine where we should redirect the user to, it's advised that you base your redirect logic on enumeration fields (dropdown, radio select, or checkboxes) instead of text fields, as it's incredibly hard to account for all the different responses a user may input in a text field, even if it seems obvious or straightforward. There are also some exceptions to this rule, however, for example a Number field that you've put property rules around.

How to Dynamically Redirect Your Form
Preparation
Before diving into the code, there are a couple things you'll want to do:
- Take note of the internal label of the property/properties you'd like to base your logic on.
- The internal label for any property can be found by clicking on the code symbol to the right of the property name within the property editor, or within the form editor itself, directly to the right of the field label.
- Decide on an easily recognizable variable name for your logic marker.
- For example, if you are dynamically redirecting your form based on the user's answer when asking their favorite color, your variable name could be 'color'.
- For example, if you are dynamically redirecting your form based on the user's answer when asking their favorite color, your variable name could be 'color'.
- Have the URLs you'd like to dynamically redirect to on hand.
With preparation out of the way, let's dive into the code!
Note: In your form settings, the form must be set to display an inline message, not to redirect to another page. Otherwise, your form will not dynamically redirect.
The Code
- If your form is hosted on a HubSpot page, you'll want to navigate to the 'Settings' tab, and enter your code into your Head HTML under Advanced Options.
- If your form is hosted on a non-HubSpot page, you can insert this code within the <head> tag on your page, or directly inside your form's embed code.
First things first, we're working with JavaScript in HTML, so all your code should be surrounded by <script></script> tags.
Defining Variables
For this example, let's say we want to redirect our user based on their favorite color, and the internal label of the property where we store that is 'favorite_color'. We'll first define our variable 'color' – we'll come back to it later.
<script>
var color;
</script>
Setting Up An Event Listener & First Global Form Event
Next, we'll want to set up an Event Listener and have it look out for an 'onFormSubmit' global event.
<script>
var color;
window.addEventListener('message', event => { if(event.data.type === 'hsFormCallback' && event.data.eventName === 'onFormSubmit') { }});</script>
Cycling Through The Form Questions
After we've set up our event listener and have it looking out for an 'onFormSubmit' event, we need to tell it what to do whenever the form is submitted.
<script>
var color; window.addEventListener('message', event => { if(event.data.type === 'hsFormCallback' && event.data.eventName === 'onFormSubmit') {
// This for loop cycles through each form field and the data submitted within itfor (item in event.data.data) {
   // This if statement checks for whether the field matches with what we're looking for.
   // In this case, the 'favorite_color' property.
if (event.data.data[item]["name"] == "favorite_color") {
// Setting our previously declared 'color' variable to equal what the user submitted.color = event.data.data[item]["value"]; } } }
});
</script>
Setting Up Our Second Global Form Event and Dynamically Redirecting
Without getting too technical, our first Global Form Event, 'onFormSubmit' fires when the user clicks Submit, but before HubSpot has actually captured the form submission data. In rare circumstances, this can lead to the user being redirected and the form data being lost before being sent to HubSpot if we only use the 'onFormSubmit' event.
Because of this, we'll do our redirect once the 'onFormSubmitted' event is triggered, which only fires after HubSpot receives the data.
<script>
var color;
window.addEventListener('message', event => {
if(event.data.type === 'hsFormCallback' && event.data.eventName === 'onFormSubmit') {
for (item in event.data.data) {
if (event.data.data[item]["name"] == "favorite_color") {
color = event.data.data[item]["value"];
}
}
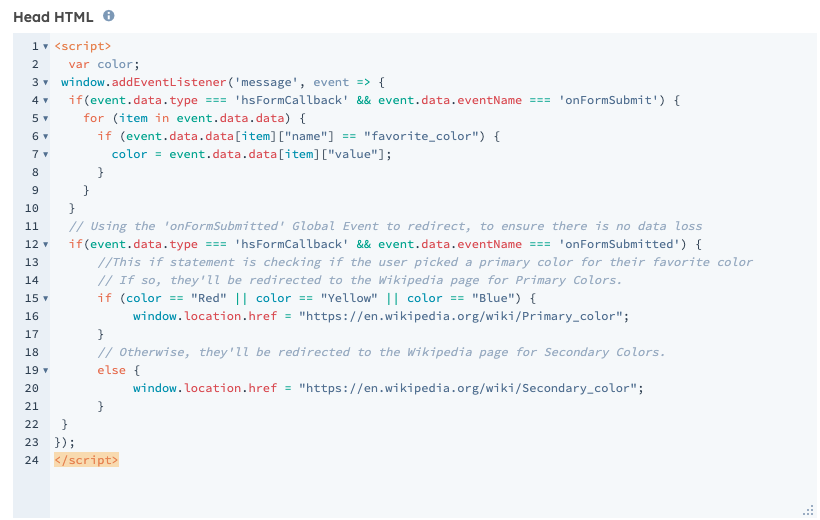
} // Using the 'onFormSubmitted' Global Event to redirect, to ensure there is no data loss if(event.data.type === 'hsFormCallback' && event.data.eventName === 'onFormSubmitted') {
//This if statement is checking if the user picked a primary color for their favorite color
// If so, they'll be redirected to the Wikipedia page for Primary Colors.
if (color == "Red" || color == "Yellow" || color == "Blue") {
window.location.href = "https://en.wikipedia.org/wiki/Primary_color";
}
// Otherwise, they'll be redirected to the Wikipedia page for Secondary Colors.
else {
window.location.href = "https://en.wikipedia.org/wiki/Secondary_color";
}
 }
});
</script>
Full Code & Live Demo
And that's it! Here's what it would look like inside HubSpot.

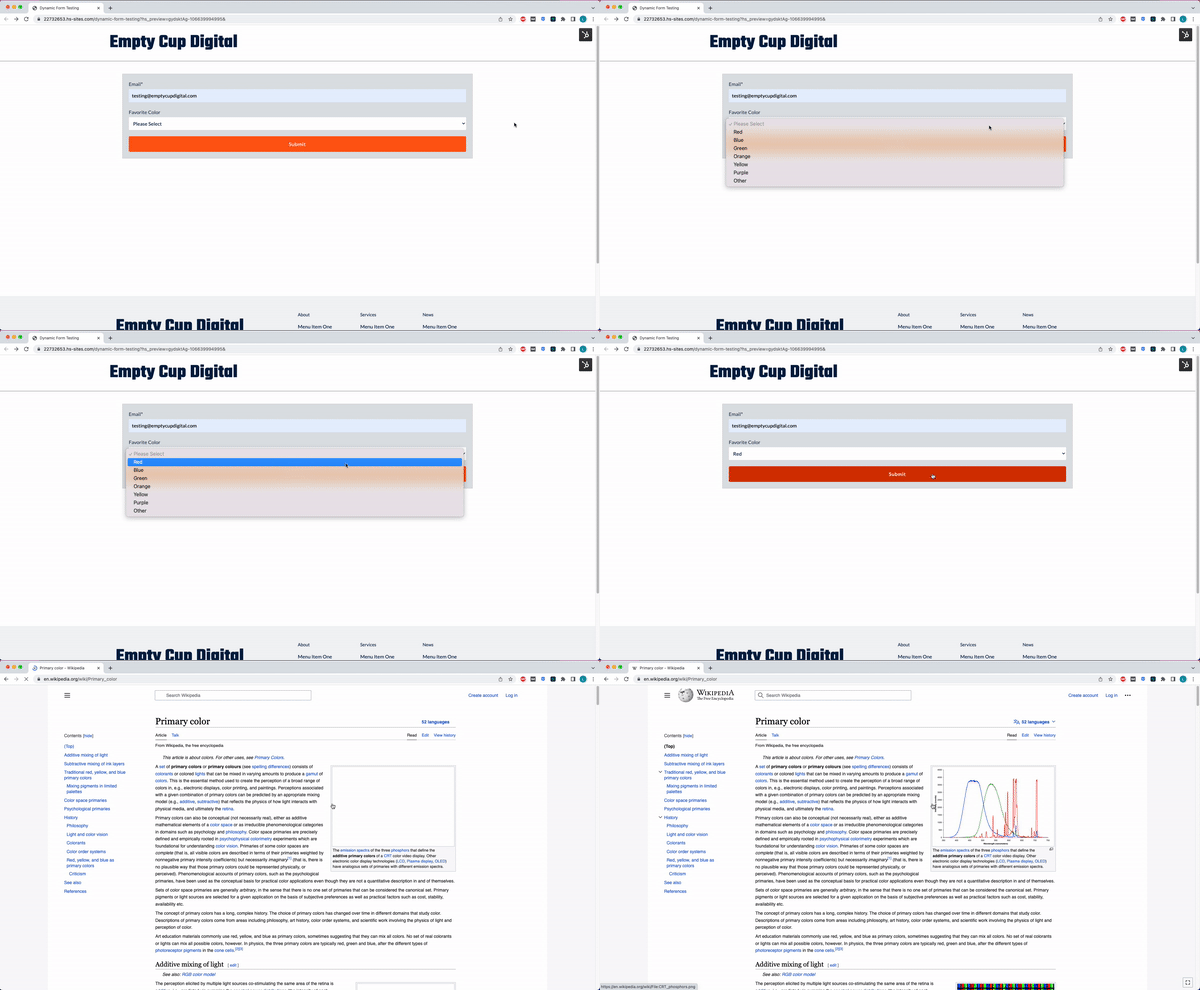
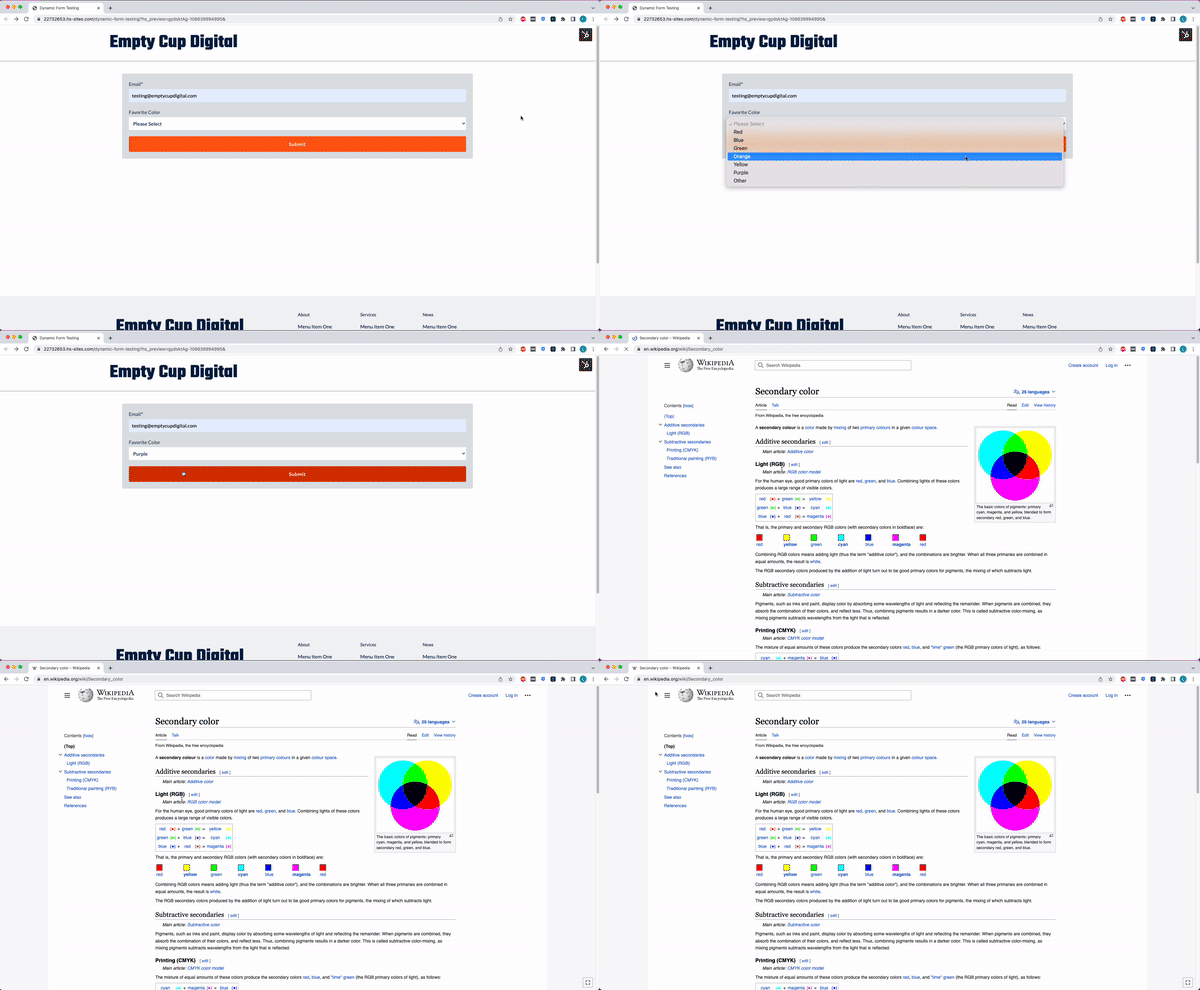
And here it is in action:

Redirecting to the Primary Colors page after selecting 'Red'

Redirecting to the Secondary Colors page after selecting 'Purple'
If you'd like to modify the message that briefly appears after submission, or show no message at all, you'll be able to do that as you would normally.

Example Use Cases
There are a myriad of use cases for dynamic form redirects – here are some of our favorites:
- Directing leads to a certain team member's meetings page based on the state they select their company is based in, according to your team's territory assignments.
- Directing leads to a tailored 'Thank You' page based on the form data they submit like their industry, job title, etc.
- Allowing contacts to navigate through multi-part, advanced logic forms based on the answers they give in each part.
- Directing customers to a corresponding payment page based on a product they choose.

The Last Sip
Although there is some technical aptitude required for setup, the ability to dynamically redirect your HubSpot forms is an incredibly powerful tool you can leverage across many applications, saving time and reducing friction across marketing, sales and, operations.
If you're looking to caffeinate your revenue operations with dynamic form redirects or have any questions, don't hesitate to reach out.


